John R Walker is possibly more passionate about veggie gardening and cooking home grown produce than he is about anything else. These are notes about growing veggies, curing meats, sausage making and cooking with them. Always keen to share interesting recipes and source heritage vegetable seeds, if you have any tips, please use the contact form below.
Late Winter 2021
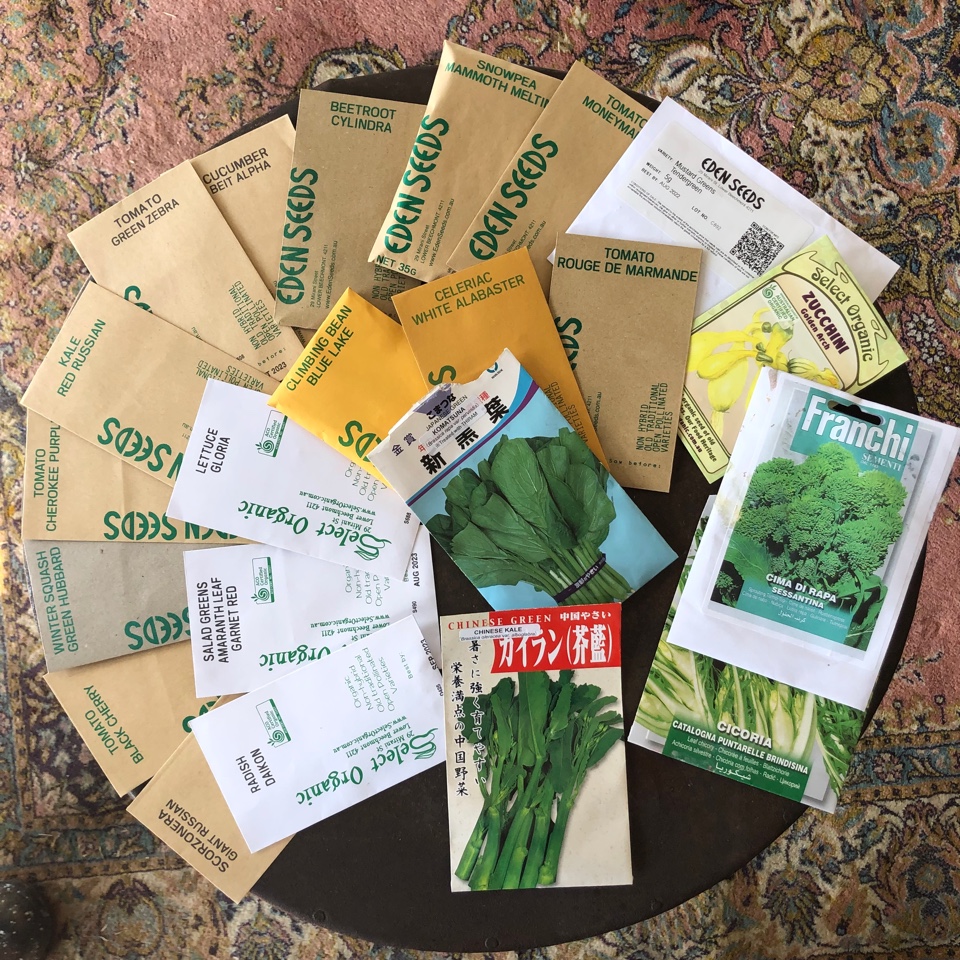
I love this time of year; seed catalogues arrive, much cogitating, orders placed and the anticipation builds as I wait for the mailed package to arrive! I’ve weeded the garden beds, tidied them up, layered them with new straw. Carefully watching over the greenhouse – aka Crystal Palace – and getting small seed parcels ready to receive this new delivery. I make the see parcels out of old newspapers, wrapped around a wine bottle. These are then filled with potting mix and placed in a plastic tub in the Crystal Palace. So excited. In the meantime, here is a wonderful, versatile soup stock base for use as a basis for boiling bones, vegetable soups whatever…
Winter soup stock base
Ingredients:
4l water in a large pot
1 small carrot, whole
1 medium onion, whole (partially slit open)
10 slices of fresh ginger
3 slices of dried Chinese angelica
1 large Star Anise
1 cinnamon stick
4 unpeeled garlic cloves
1 bay leaf
1 cup of Soya sauce
1 cup of cooking Sake
1/2 tbsp fish sauce
Generous handful of black pepper corns
Method:
Bring to a simmer and let it cook gently for a few hours. Strain, adjust for taste and use this as the base for vegetable soups, or as a clear both.
Winter 2021

Another COVID lockdown in NSW. No outbreaks here in Braidwood but we’re all being cautious. I’ve just returned from one month in South Australia – very thankful that we made it in and out in time, as we had planned to return after the 2018 Adelaide Biennial in 2020 but fires, floods and COVID put a stop to that. So we made it to Adelaide to catch up with friends, see AGSA Clarice Beckett exhibition and then to Burra Regional Art Gallery to set up my works on paper show, ACROSS COUNTRY and then headed off Pitcairn Station for an Across Country Artist Camp with me as mentor artist.
We have been spending some time at one of our favourite places in the Badja; a cold, wonderful sub-alpine snow-grass plain with spagnum moss, crystal clear streams and snow-gum forests. As well as wandering around boiling the billy and just enjoying doing nothing much, I’ve done a bit of cooking on the open fire, including Sous-vide goat shoulder, roasted over coals. The Braidwood butcher has some local goat that is top-rate: tender, flavoursome. Here’s my winter 2021 recipe.
Roasted Goat Shoulder
Ingredients:
2 suitable large plastic sous-vide bags (we have a vacuum sealing apparatus for preserving dry goods, I use this and take the precaution of sealing the meat in double bags in case one splits)
1 shoulder of goat
zest of one lemon
3 garlic cloves, coarsely chopped
dried Oregano (preferably from your own garden), or Greek dried Oregano
Rosemary stalks
2 tablespoons red wine (can’t use too much liquid in sous-vide, as vacuum packing will suck out the moisture)
1 anchovy, roughly chopped
S&P
Method:
Put goat in a bag and rub all the above ingredients over it. Use the vacuum sealing apparatus to seal and seal again inside another bag. Put on a large pot of hot water with a suitable cooking thermometer in the water (it normally clips to the side of the pot). For this process the water needs to be at a constant between 70-80 degrees. It must not boil nor be allowed to drop below 70. The goat package should be held in this hot water for about 6 hours (the amount of time required varies depending on the meat’s tenderness). When completed, put into fridge, or it can be frozen and defrosted when needed. It will keep well for about a week.
Take package out of fridge or freezer and allow it to come to room temperature. Put it back into a hot water bath (as above) for about 45 mins to warm through. Carefully open the bag (you want to keep the juices) and cook it gently over hot coals – don’t burn it – or in a hot oven until sealed and basted in the juices from the bag. I serve this with cubed potatoes, rubbed generously in olive oil, garlic, rosemary and salt and baked in a hot oven for about 1 hour, plus sugar snap peas lightly tossed on a hot griddle with some XO sauce until they turn glossy green. This goes well with a good quality red!
Autumn Winter 2020
Covid19 cooking
Warm Beetroot relish
Ingredients for 5 serves, side dish:
- 2 medium sized beetroots
- 2 tblsp cumin seeds
- zest of 1 Orange
- juice of 1/2 orange
- juice of 1/2 lemon
- aged balsamic vinegar or vincotto
- 2 tsps cooking sake
- salt and pepper to taste
- white wine vinegar
- olive oil
Method:
Scrub beets clean, remove roots, stems and leaves (stems and leaves can be cooked separately as a delicious green, braised with cultured butter). Using a mandolin slice thinly nto matchsticks. Heat olive oil over moderate flame, add beetroot and toss regularly for a few minutes. In a separate heavy bottomed pan, toast cumin seeds until aromatic, then add cumin seeds to the beetroot mix. Salt and pepper to taste. After a few minutes add orange zest and the juices, plus 2 tsps of cooking sake. Cook mixture on gentle heat until the beetroot is as tender as you like. Add balsamic vinegar or vincotto and white wine vinegar to achieve your preferred acid/sugar balance. This is best served warm, but will keep in the fridge for a few days.
Spanish style hot chocolate

Ingredients for 5 serves:
- a 100gm block of Lindt dark chocolate or coco chocolate
- 6 small cups of milk
- about 20 gms of potato flour
- about 20gms of butter
- 1 egg yolk
- sugar to taste
- brandy ( or any spirit of choice)
Method:
Heat milk in a small saucepan to about 90 degrees C to simmer point. Melt the butter and gradually add flour, stirring all the time, and cook for about 2 minutes or has a wet sand-like texture. Take roux off the heat, and gradually pour milk slowly into roux while continuously stirring. Add broken up block of Lindt dark chocolate. Stir until chocolate and custard amalgamate. Then add 1 egg yolk and castor sugar to taste, stir to mixed, and add about 1 dessertspoon of brandy (or alcohol or choice). Return to heat, add some remaining hot milk to get a custard consistency! Pour into warmed coffee cups and serve with biscotti.

Rustic tomato tart with olive oil pastry
Pastry ingredients: indicative
- · 350gm plain flour
- · ½ tsp salt
- · 150ml olive oil, plus extra for drizzling
- · ¼ cup cold water
- Filling ingredients:
- · 300gm small tomatoes, halved
- · 250ml homemade tomato sauce
- · pipped black olives (12)
- · ½ log goats cheese (or mozzarella etc)
- · fresh rosemary leaves
- Tomato sauce ingredients:
- · 1 to 1 ½ kg of ripe, flavoursome tomatoes (halved)
- · 2-3 garlic cloves, crushed
- · fresh oregano
- · 6 anchovy fillets (mashed)
- · sambol oelek style chilli (flavoursome rather than red hot!)
- · pepper and salt
- · good quality olive oil
Tomato sauce method:
Place halved tomatoes, oregano, garlic and salt in a baking dish; cut side up. Drizzle over with olive oil. Bake in a low-moderate oven for about 1 hour, or until soft. This can then be frozen for future use: great way to deal with tomato glut. Place the mixture into a mouli with a sieve fine enough to remove the seeds. Add the anchovy fillets and chilli and process into a heavy bottomed saucepan. Discard skins, seeds and other matter. Bring saucepan mixture to a simmer, then leave on a very low heat (or if suitable, put into the over at 100 degrees C) and allow it to gently reduce to about 50% or a nice thick syrup. If on stove top, stir regularly to prevent sticking and burning. Again this sauce if suitable for freezing for future use.
Olive oil pastry method:
Mix flour and salt in a bowl. Gradually add olive oil and use a fork to stir, aiming for crumble texture. Add just enough cold water to help it form a dough ball (not wet); approx 4 tblspns. Wrap pastry in clingwrap, put in fridge, best overnight. Keeps in fridge for several days. Remove from fridge and place pastry ball between 2 sheets of greaseproof paper and roll it out to about the thickness of a 20c coin. It is fragile but very forgiving; any tears just repair.
Brush tart tin with olive oil and sprinkle with salt. Remove the top sheet of greaseproof paper and flip the tart tin so that it is face down on the pasty. Using the bottom sheet of greaseproof, flip the tin and pastry so that the pasty falls into the tin. Prick the pastry base with a fork. Heat the oven to 150deg C and bake shell for about 50mins, until dry but not golden. Any leftover pasty can be cut into shapes, and baked as savoury biscuits.
Tomato tart method:
Spread the tomato sauce over the base of the cooked tart shell. Sit the tomato on top, cut side up. Cut goats cheese and distribute around the shell. Sprinkle the cut olive over. Sprinkle with rosemary leaves, pinch of salt and pepper. Bake at 150deg C for about 30 mins, until the tomatoes are soft. Serve with a nice green salad!
Spring 2019

Saturday 28 September: While the soil is still a bit cold (we had our first heavy fall of snow in a decade last week), I’ve begun preparations and plantings for the coming summer, which includes seed selections such as celeriac, Italian sprouting broccoli, Japanese snowball turnips, Dutch cylindrical beetroots, a huge variety of heritage tomatoes including one called ‘Voyager’ (claimed to feature pronounced segments like a mandarin). Oh and the Italian yellow zucchini which was so successful last year (and made delicious goat cheese, zucchini fritters) plus an Italian variety of green cucumber that was both prolific and really tasty. And many more of the usual suspects :-).
Dug a tipper load of mushroom compost into the veggie garden beds plus a handful per square meter of water retention crystals; same again with dolomite and a light dusting of sulphate of potash. Potash improves fruit set, particularly in tomatoes, cucumbers and pumpkins, and in general makes for healthier plants. For the tomatoes this year, I have installed a drip watering system so I can deliver measured amounts of water directly to the roots and thereby reduce both water wastage and opportunity for diseases (caused by water splash) to occur.
Last nigh we had our first salad directly from the garden, mostly from beautifully speckled baby romaine lettuce that were ‘volunteers’. For the home gardener it is a good idea to let some of your lettuce and celeriacs go to seed – you get free plants and because the seeds of these plants are not long lived, you often get better results from the fresh self-seeding, than from packets.
Promise to provide further regular updates and photos as the season unfolds!
Our friend and fellow gourmand, Ms Justine van Mourik, shared this fabulous goat curry recipe from Mrs Singh’s restaurant in Adelaide. We’re using fantastic local Boer goat from Willmond Park in Braidwood. If you want contact details for Willmond Park, contact me here
Mrs Singh’s Goat Curry
Ingredients:
- 1kg Goat meat cubed
- 5 cm Cinnamon stick
- 5 Cloves (whole)
- 1 teaspoon Mustard seeds
- 1 teaspoon Fenugreek seeds
- 1 teaspoon Fennel seeds
- 5 Green cardamoms (whole)
- 2 tablespoons Ginger/Garlic paste
- 3 Onions large, peeled and finely diced
- 2 tablespoons Curry powder for red meat
- 1 tablespoon Garam masala
- 1 teaspoon Red chili powder
- 1 teaspoon Turmeric powder
- 1 teaspoon Salt (or to taste)
- 1 bunch Fresh coriander chopped finely
- 1/2 cup Coconut milk (I use a whole tin for more sauce and cook it down longer)
- 1 cup Green peas
- 2 Tomatoes cut into eights
Method:
- Heat oil in a heavy based saucepan and add cinnamon stick, mustard,
- fenugreek, cardamoms, fennel and cloves. Stir for 10 seconds.
- Add ginger, garlic paste and keep stirring for another 30 seconds.
- Add chopped onions and keep stirring until the onions are soft.
- Add the cubed goat meat, curry powder, turmeric, chili powder and salt. Stir through until the meat
- is properly coated with the spices.
- Lower the heat and cover the pan, stir frequently and cook for 15 minutes.
- Add the coconut milk and cook for another 30 minutes over slow heat until the meat is tender.
- Add the peas and garam masala. Stir for 5 minutes.
- Add the tomatoes and coriander – I cook them into the curry or they cook when it reheats either way I leave them in for longer
Take off the heat. Serve with rice.
Hindmarsh Square, Adelaide, South Australia
Spring 2018

Winter 2018
It’s a long time between drinks since last year’s entry. There’s been a lot of travelling – to the Flinders Ranges, Adelaide, Burra and most recently Kyoto, Japan. Over the past six months, I’ve tried a number of new recipes and in particular, I found a great solution to the perpetual question of what to do with surplus zucchinis! The following zucchini fritter recipe is delicious and makes great finger food for parties.
Zucchini Fritters
Ingredients
1/2 kg zucchinis
100g soft goats cheese or un-salty fetta
100g coarsely grated Jarlsberg (or similar) cheese
3/4 cup potato flour
2 tsp salt and, pepper to taste
1 egg
Oil for deep frying
Method
Coarsely grate the zucchinis. Put into a colander lined with a clean Chuz cloth and sprinkle salt on the mixture. Place a weighted plate on top and leave to drain for at least 2 hours. Pull out handfuls of the mixture and squeeze out as much water as possible. The aim is to get the zucchini mix as dry as possible. In a bowl, mix goats cheese, Jarlsberg and the zucchini mix. Add potato flour, egg and black pepper to taste. Mix through. Heat enough oil to deep fry – aim for 170-80 degrees (use a cooking thermometer, or stick a wooden chopstick to touch the bottom of the pan and when bubbles start to form around it, the temp is OK). Form mixture into golf ball sized rounds, and drop, one at a time into the hot oil (don’t try and fry more than 2 at a time). Turn to cover and after a few minutes, they should be golden and crispy. Drain onto paper towels on a tray and keep warm in the oven.
Serve with aioli or horseradish mayonnaise.
Another recipe that is great for dinner parties is stuffed, boned whole roasted chicken. It is worth finding a good butcher who can bone the chicken and stuff (with your stuffing) and roll up, ready to bake.
Ingredients
1 whole free range chicken
1 1/2 cups sticky rice (Japanese sushi rice is also OK)
5 dried shitake mushrooms
100gm pancetta (whole piece)
1 tsp fennel seeds
1 tblsp cooking sake
1 tblsp light soy sauce
2 cloves garlic, finely minced
12 thin slices of pancetta (for wrapping around the chicken)
Freshly grated pepper
Method
Preparing the stuffing: rinse rice and then leave to soak in about 1 1/2 cups of water overnight. Then put rice into a steamer, add 11/2 cup of water and steam until cooked. Leave to stand. Hydrate the shitake mushrooms with small amount of water (3 tblsp), soy sauce and sake. Simmer, covered for about 1 hour until the mushrooms are soft. Dice the whole pancetta into small cubes and fry until transparent (about 5 mins). Finely dice shitake mushrooms, add minced garlic and mix with the diced pancetta, fennel seeds, pepper and mix through the rice. Leave to cool in fridge.
If you have an agreeable butcher – take the stuffing and the 12 thin slices of pancetta to your butcher who will bone, stuff and wrap the beast ready for collection. Normally, I cook this in the Weber bbq; place aromatic herbs such as sprigs of thyme, marjoram, rosemary on the hot coals so that the chicken is infused with flavour. Cook for about 1 1/2 hrs in the Weber. Because there are no bones, its very easy to slice and serve. I serve it with my homemade sour cherry sauce or damson plum sauce, and a green salad.
Winter 2017
July, the depth of winter in Braidwood; the veggie garden is quiet apart from spinach, garlic and other plants not bothered by -5 or worse! Our pumpkin and parsnip harvest is continuing to feed us well. Our french friend and I have just taken our annual delivery of a free range pig and have started making prosciutto, pedestrian sausages and cured pork bits.
It’s a great time of the year to try out roasted, miso-cured pork (thanks to Adam Liauw!). This is a very easy and amazingly tasty way to do pork.
Miso cured Pork

Ingredients (quantities easy to scale up and down):
1/2 kg belly pork, skin removed (this can be frozen and used later for roasting)
300g light miso (as in lower in salt and not too strongly flavoured)
2 tblspn cooking sake
1 tablspn cooking mirin
clean muslin cloth
1 sealable plastic box
Method:
Cut the skinless pork belly in to 7cm width strips. Mix mirin, miso and sake in a bowl; consistency, so slightly runny. Spread a layer of mirin on the bottom of plastic box. Put a layer of muslin on top and arrange the pork on top of muslin, and place another layer of muslin over pork and cover with remaining miso paste. Seal lid and put in fridge to rest for 2 nights.
To cook: remove pork and wipe off miso. Rub meat with a little bit of oil and salt. Roast in a very hot oven – 180-200C – for about 25 minutes until it starts to blacken on the edges. This goes really well with a horseradish mayonnaise and freshly mandolined daikon radish. Also with roasted sweet potato or pumpkin. Absolutely delish and even better cold, if it lasts that long!
The miso mixture can be kept in fridge and reused within 2 weeks. This miso pickling approach can also be used to pickle vegetables but do not pickle veggies that will be eaten raw in the miso that has been used for raw pork. Make a fresh batch for the vegetables.
Summer 2016
It’s been a while…here’s an image from one of my Chinese folding books of the Murrumbidgee River in flood around Hay, NSW in late September.

And…the Christmas Eve Dinner Menu ![]() ?
?![]() ?
?
Moet & Chandon![]() ? with homemade antipasto
? with homemade antipasto
Anderson’s aged Pinot noir Chardonnay ![]() ? and Gilles Bernardoff‘s prosciutto
? and Gilles Bernardoff‘s prosciutto
Seppelt’s Drumborg Riesling ![]() ?with porcini and truffle ravioli in burnt butter and lemon basil
?with porcini and truffle ravioli in burnt butter and lemon basil
Pikes Shiraz Tempranillo ![]() ?with Glazed Xmas Ham and green beans
?with Glazed Xmas Ham and green beans
Seppelt’s Chalambar Shiraz![]() ?with twice cooked, hot smoked duck and baked potatoes
?with twice cooked, hot smoked duck and baked potatoes
Scotchmans Hill late picked Riesling ![]() ?with Anne’s Xmas Pud Supreme, butterscotch sauce, macadamia ice cream, followed by fresh picked blackberries…..
?with Anne’s Xmas Pud Supreme, butterscotch sauce, macadamia ice cream, followed by fresh picked blackberries…..![]() ?
?![]() ?
?![]() zzzzzzzz
zzzzzzzz
Winter 2016
It’s been a while since I last posted any gardening or cooking tips. The parsnips seem to have self-seeded so I have been harvesting lots of lovely baby parsnips. After an unseasonably warm autumn, winter arrived with a bang earlier this week: -1oc down by the creek, -7c at home at 6am on Monday 30 May, with crispy white frost on the roof. In Australia, we are in election mode. The Deputy PM recently came out with a great piece of regional vernacular which a wonderful local artisan (Ian Marr) caught in slate: ‘going off like a frog in a sock’!

I came across this recipe in a recent Weekend Australian Magazine (May 28-29), by David Herbert. It reminded me of some of those rich meat pies of my childhood. I’ve tweaked the recipe ever so slightly; it seemed the perfect accompaniment to the recent signaling that winter had definitely arrived.
Beef Gratin, serves 4-6
Ingredients:
3 tblsp vegetable oil
2 onions, sliced finely
2 garlic cloves, chopped
850g braising steak, cut into 2cm cubes (think I might try beef cheeks next time)
1 tbsp plain flour
salt and pepper to taste
thyme sprigs
2 tbsp tomato puree
1 bottle red wine
1 cup of beef stock
1 tsp Worcestershire sauce
1 tsp caramelised Balsamic vinegar
slurp of Marsala
100g breadcrumbs (oven dried, day old sourdough)
100g grated parmesan cheese
Method:
Heat oil in frypan over moderate heat; add onions and garlic and cook, stirring, till soft. Add meat; sprinkle with flour. Cook, stirring, for 5 mins. Add thyme and tomato paste; cook for 2 mins. Pour over red wine, stock and marsala slurp, cover and simmer for about 1 and 3/4hours or until meat is tender. Add a Worcestershire sauce and Balsamic vinegar. Remove meat and onions to an oven-proof dish and set aside. Bring liquid to boil and simmer until thickened. Return meat to pan; stir, season and reheat. Transfer everything to the oven-proof dish and sprinkle top with the breadcrumb and parmesan mixture. Place in a pre-heated (180c) fan-forced oven, until the top is golden. I served this with creamy mashed potatoes and steamed broccolini, doused in melted anchovy butter. Delicious.
Spring November 2015
Rose heaven in the garden at the moment! Just finishing the last of our blackberry sorbet and about ready for a new batch of rose petal sorbet. Simple. And simply delicious. Planted a variety of tomatoes and now harvesting baby beetroots and baby diakon; beets delicious cooked in butter and daikon radish served with salads in a dressing of mirin, grated ginger and tamari.
 Rose – Titian along the side of the studio wall.
Winter June 2015
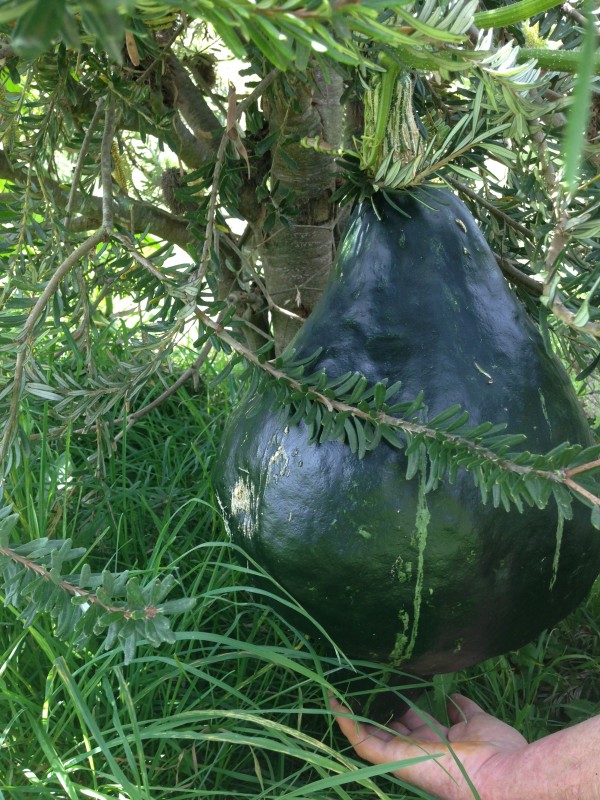
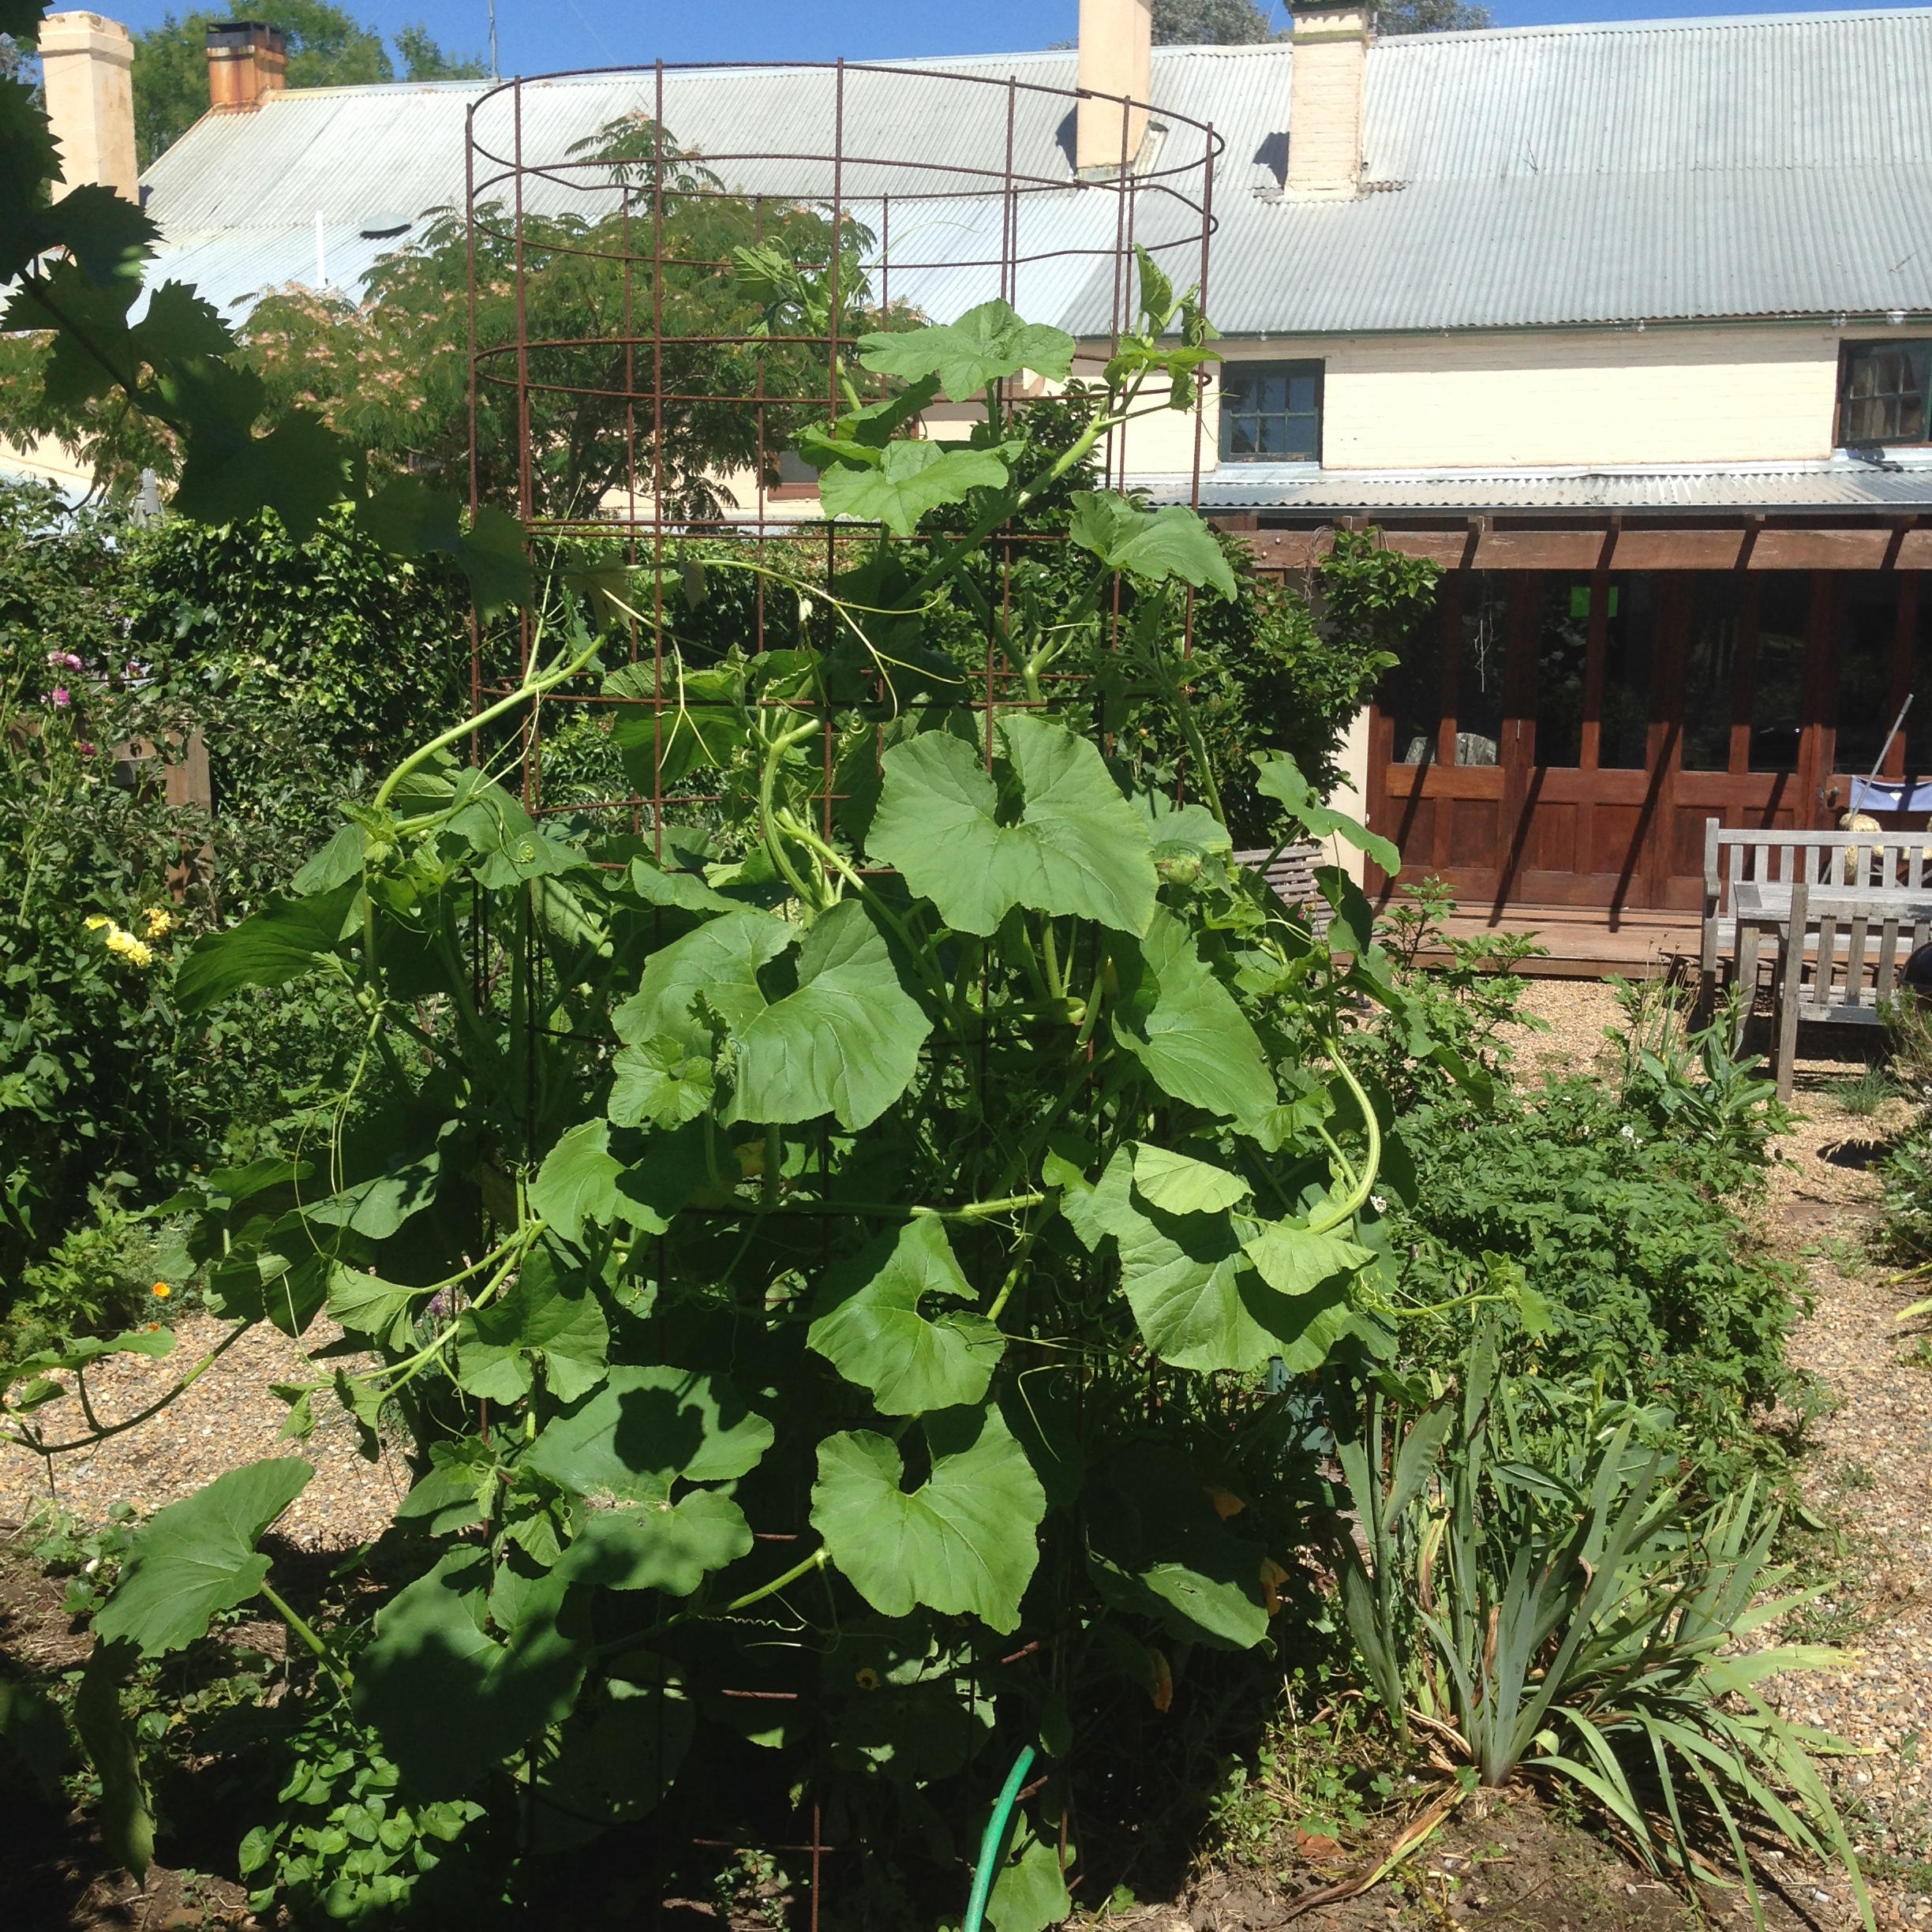
Update on the Great Warted Hubbard: I can confirm it is truly great (see photo). Late in the season it looked like giant green dinosaur gonads (and heavy as…). It has turned out to be a really good pumpkin for roasting, pie fillings and soup. In fact it is one of the gramma pumpkins favoured for pies because of the way it caramelises when baked. It’s only drawback is that it is typically 10-8kg per pumpkin. So when you want to open one – you’ll need to cook it all at one, or share it amongst your friends. This is a BIG sprawling pumpkin plant that climbs and runs rampant – not suited to small (or neat…) gardens.
Recipe: My pumpkin pie
Ingredients:
2 cups of roasted, mashed pumpkin (equivalent to about 750 unbaked pumpkin)
1 cup of double cream
2 eggs + 1 extra yolk
cinnamon, nutmeg and ginger to taste
just under 1 cup of dark brown sugar (gramma pumpkins are sweet; if you use other types you may need to increase this amount)
1 capful of brandy or marsala
Good quality readymade shortcrust pastry
Method:
Line a 20cm pie dish (preferably non-stick) with pastry, rolled out thinly. There is not need to pre-bake. Place the pumpkin and the other ingredients in a mixing bowl and combine until smooth. Pour this liquid into the pie shell and place in a hot, 180C over for about 10 mins until it starts to puff up, and then drop the temp to 130C and cook for a further 30-40mins until a knife come clean from the pie mix. Allow to cool for 2 hours. It improves with a couple of hours of settling. Serve with good quality vanilla ice cream or pannacotta.
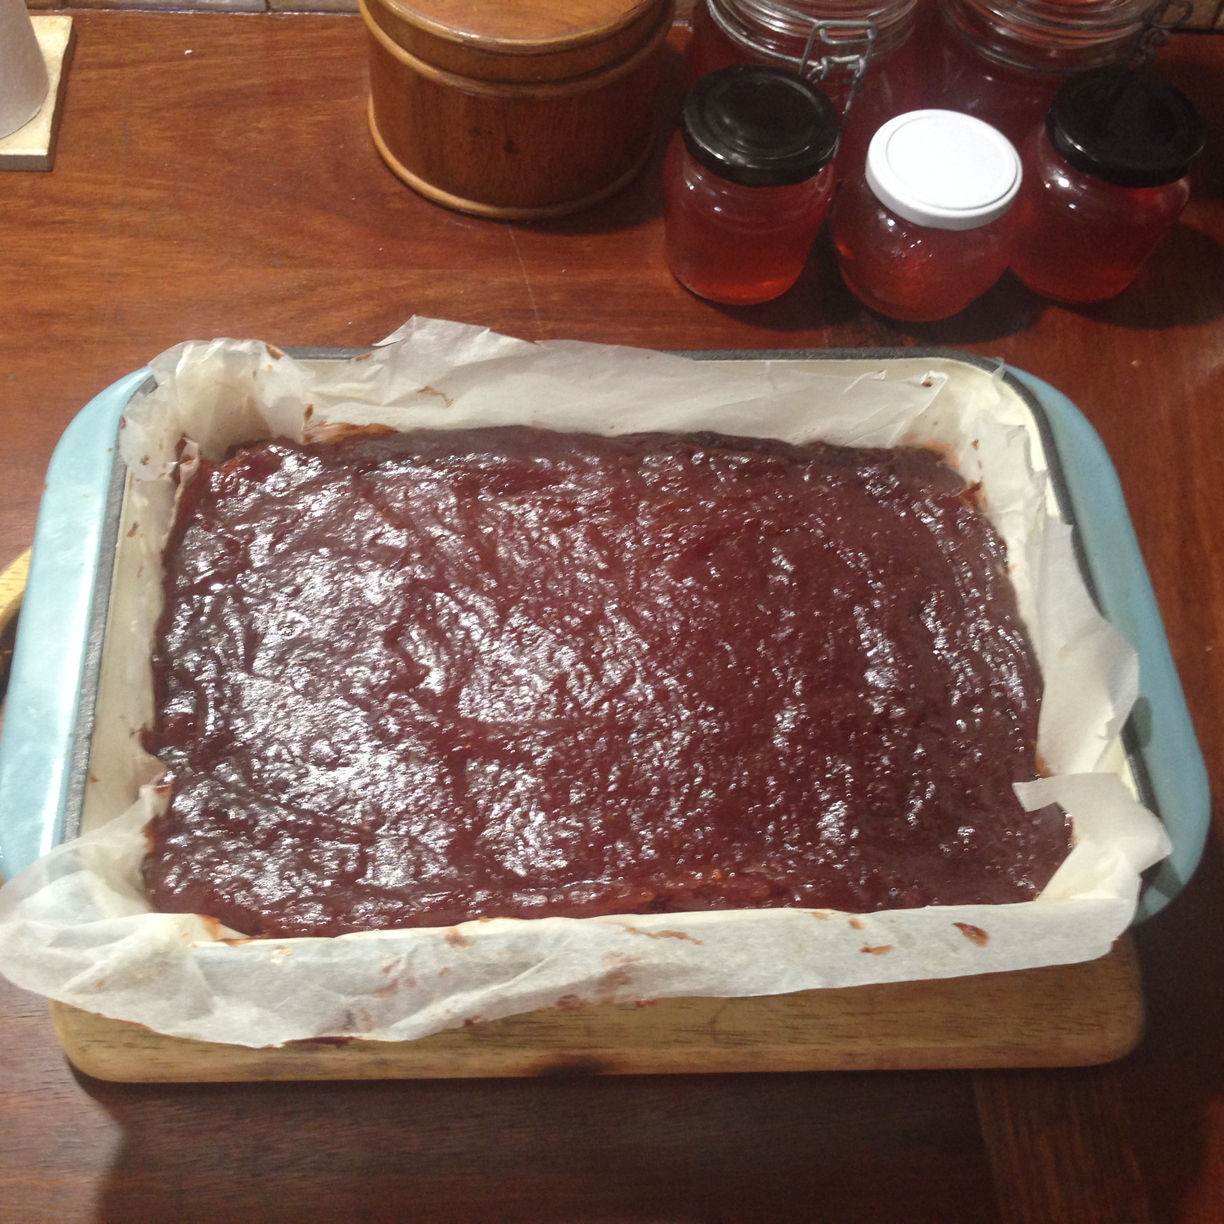
Preserves: The neighbour’s quince hedge produced spectacularly this year! From which we made excellent quince and rose-petal jelly and I think the best quince paste ever!

I planted extra tomato plants this year and a greater variety: black russians, a range of different cherry toms (including a pink variety whose name escapes me) and stripey tigerellas. While they took until February to really crop, we had a long season this year and we were picking a kitchen colander full every day. A portion of this surplus was slow roasted with garlic, bay leaves, olive oil and salt for several hours and then frozen for later use. We also made some very good tomato chilli relish.
Recipe: Tomato Chilli Relish
Ingredients:
4kg tomatoes (very ripe)
1.5kg sugar
500ml white vinegar
1 tblsp salt
2 whole Mexican smoked chillies (cut up; quite large and mild or alternatively good quality smoked paprika)
5 whole cloves
4-5 garlic cloves, peeled and roughly chopped
1 handful of black peppercorns
Method:
Wash tomatoes, remove stalks and any imperfections. Place in a heavy, shallow baking dish in a pre-heated oven (at 180C) and leave until they start to sizzle. Turn the oven down to 120C and leave for 2-3 hours, until the tomatoes are soft and have a slightly singed quality. Push through a moulie into a large stove-top saucepan. Add remaining ingredients and heat gently until sugar is well dissolved. Pour mixture back into the heavy baking dish and place in a cool oven at 100c and leave for several hours until reduced by half. Once thoroughly cooked, sauce is poured in sterilised jars and sealed. After filling and sealing, turn jars upside down for about 1/2 hour so that the lid is properly sterilised by the hot liquid.
Very popular with BBQ snags!

Autumn – mid March 2015
Just a quick note: currently overwhelmed with an abundance of great produce: multitudinous varieties of heritage tomatoes; raspberries and blackberries have just come to an end, as have the plums, apples, pears and now the quinces are in ascendance! Will report in on preserves!
Summer – February 2015
Have just returned from a wonderful month in Vietnam – based in the beautiful heritage town of Hoi An in Central Vietnam. We made an heroic effort to eat our way to success! Food in Hoi An region is famously good. We had a number of very memorable food moments. This is the first of a number of installments.
We had two cooking lessons with Nguyet, a wonderful local chef who runs the Baby Mustard restaurant and school. Her classes are limited to a maximum of 4 people with highly personalised approach and deeply knowledgable. One of the delicious dishes we really wanted to learn to cook was mackerel bbq’d in banana leaves. Recipe follows:

Prepare the marinade for the mackerel:
3 short stalks of lemongrass, sliced extremely finely
A couple of shallots chopped very finely
a couple of spring onions, very finely chopped.
a small red chilli, chopped finely
1 medium sized cutlet of mackerel per person
Mix these with 2 tsps each of sugar, salt and 3 tsps of freshly ground black pepper. A tblsp of fish sauce and sprinkling of vietnamese curry powder (strong on turmeric and garam masala). And the secret ingredient: mix in 3 tblspns of Hoisin sauce. Mix thoroughly and then rub mixture over the fish. The fish had been cut into cubes. Leave to marinate overnight, covered, in fridge.
Assemble fish and marinade on 2 banana leaves that was folded 3 times into a parcel. Place parcels into wire sandwich style holder and bbq slowly over charcoal for about 15 minutes, turning. The resulting combination of steamed marinade and fish, slightly smoky flavour of the leaves was irresistible.

Summer – December 2014
For the first time, I am trying out the Great Warted Hubbarb pumpkin – it is growing like a triffid. Have no idea what it will be like to eat, but so far it looks fantastic. See pic:
Berry fruits and cherries have cropped abundantly this year. What to do with such abundance is THE question in the Back Paddock at the moment. We used to make jams – blackberry, cherry, raspberry – and sauces – plum – but there is a limit. A better use is to make lots of sorbets which keep in the freezer for months (if they last that long!). Fruit sorbets as easy-peasy to make.
RECIPE: Sour Cherry Sorbet
Pick enough sour cherries (we have Kentish cherries) to fill a large saucepan. Add about 200gms sugar – we use Anne’s rosepetal flavoured sugar. Add a small coffee cup of Marsala wine and heat gently, stirring, until the cherries have released their liquid and softened and some of the bitter almond flavour from the kernels has been released. Test for sweetness and adjust if necessary. Process the cherries through a moulie with a fairly course sieve. Add 2-3 tsps of glycerine, which reduces the size of the crystals. Put the mixture in a bowl in the fridge to chill overnight. Next morning, place the mixture into an ice-cream maker – process according to the ice-cream maker’s instructions. Transfer the frozen sorbet to airtight containers – try to make sure that the containers are full to the top; any air pockets will speed up a drying-out, freezer burn – and freeze till needed.
RECIPE: Blackberry Sorbet
Pick enough blackberries to fill a large saucepan. Add about 150gms sugar and a scraping of a vanilla pod (vanilla and blackberries are a taste combination make in heaven!). Heat gently stirring until the blackberries have released juice. Test for sweetness and adjust if necessary. Add 2-3 tsp of glycerine. As above, place in fridge overnight to chill and then follow with the instructions.
Spring – September 2014
Spring is sprung, although given Braidwood’s propensity for very late frosts (not clear until after Melb Cup day!), it is still too early to plant frost-tender crops such beans, tomatoes, pumpkins etc here. However it is a great time to plant carrots, beetroots and most of the cabbage tribe of vegies. One proviso – planting cabbage tribe seedlings at this time of year generally doesn’t work as they almost immediately go to seed. So it’s best to plant SEEDS. By the time they have germinated and reached a reasonable size, the days will be much lengthened and they won’t think about flowering till next Spring. To get the best results from beetroot seeds, soak them in warm water on a saucer for a few hours. The seeds are contained inside a corky outer casing and pre-soaking improves germination. Carrot seeds need to be kept very moist until they germinate. Being very small seeds, they are vulnerable to drying out at the critical moment of germination.
I am very fond of vegetables that plant themselves. In Autumn, I allowed a small proportion of the parsnip crop to go to seed. This spring we have a huge crop of baby parsnips and when they get to the size as a small carrot – they are delicious to eat. It is also the time of year for asparagus and this plant is a wonderful thing for any garden that has a bit of room. If you plant about 20 corns of asparagus, which take about 2 years to establish, you’ll have about 6 weeks of a daily supply of fresh asparagus for up to 4 people. Because asparagus is a long lived crop, it pays to do a fair bit of work on the garden bed before you first plant. Use a lot of well rotted manure and compost to help build the soil up before you plant. Asparagus benefits from a yearly application of compost and manure, plus a handful of blood and bone per square metre. Blood and Bone only lacks one thing to be a complete fertiliser and that is sulphate of potash. If you add 100gms of sulphate of potash to 1 kg of Blood and Bone you have a complete, harmless general purpose fertiliser for vegie gardens.
RECIPE: Aromatic beef and root vegetable soup
Ingredients:
1/2 kg beef on the bone (Osso bucco or beef ribs)
1 bag of Chinese Stewing Spices (available from most good Chinese /Asian supermarkets)
1 generous slurp of light soy sauce
1 slurp of chinese cooking wine
1 head of garlic (whole)
1/2kg baby parsnips, baby carrots, salsify roots and/or burdock roots
1 handful of chopped land or water cress
500ml beef stock
1 thumb sized knob of ginger root (whole)
200gm fresh, firm mushrooms
Juice of 1/2 lemon
Method:
In a large pot, put the chinese spice bag, soy sauce, lemon juice, beef stock , garlic head, ginger knob and chinese cooking wine and add some hot water to make up to about 1 litre. Bring to a gentle simmer and leave for about an hour so that flavours intensify. In a separate pot, pour boiling water over the beef to rinse and remove scum and impurities. Throw water away. Then add beef to the soup mixture, cover the pot and put in an over set to about 80 degrees C. Leave to slow cook for at least 2 hours. Then add root vegetables and leave to cook for about another hour, or until the vegies are tender.
To serve: place generous scattering of cress at the bottom of soup bowls and then ladle soup, meat and vegies into the bowls. Season to taste and serve.
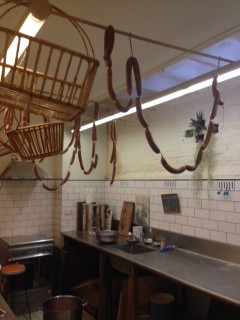
Winter – July 2014
Giles Bernardoff and I have obtained two fabulous local free range pigs and have four prosciutto salting, four sides of pancetta – not rolled and dried flat in a Tuscan manner – and yesterday we made 10k of ‘Pedestrian’, chorizos sausages. We hung them overnight and cryovac’d them today. In short, we have provided our families (and friends) with many months of porky delights. The prosciutto will be salting for another 6 days. Each day, we take them out, massage and pound them to make sure that any liquid along the bone is expelled. After a week, we’ll place them on the stainless steel bench with boards and heavy weights just to make sure that any remaining moisture is removed. Following this, they are wiped down with a clean cloth and will be hung in a cool, damp, vermin-proof, place for about 4-5 weeks until the cut-end is well dried and skin shows signs of curing. At this stage we make a mixture of back-fat, chestnut flour and pepper, with which we coat the cut-end so as to slow down the drying process. Hams are then hung for at least 6 months – the longer the better. The main problem in Australia for preserving meats is that our winters are much drier than those of the mediterranean countries and therefore trays of damp sawdust are placed nearby to keep up the humidity levels. If prosciutto/pancetta is allowed to dry out too much, it turns into unpalatable salty leather. After about 3 months, the hams are rubbed down with cognac (NO, not his hams…) and we think it is fine to repeat this treatment often. (Well, we would say that wouldn’t we).


late Autumn 2014
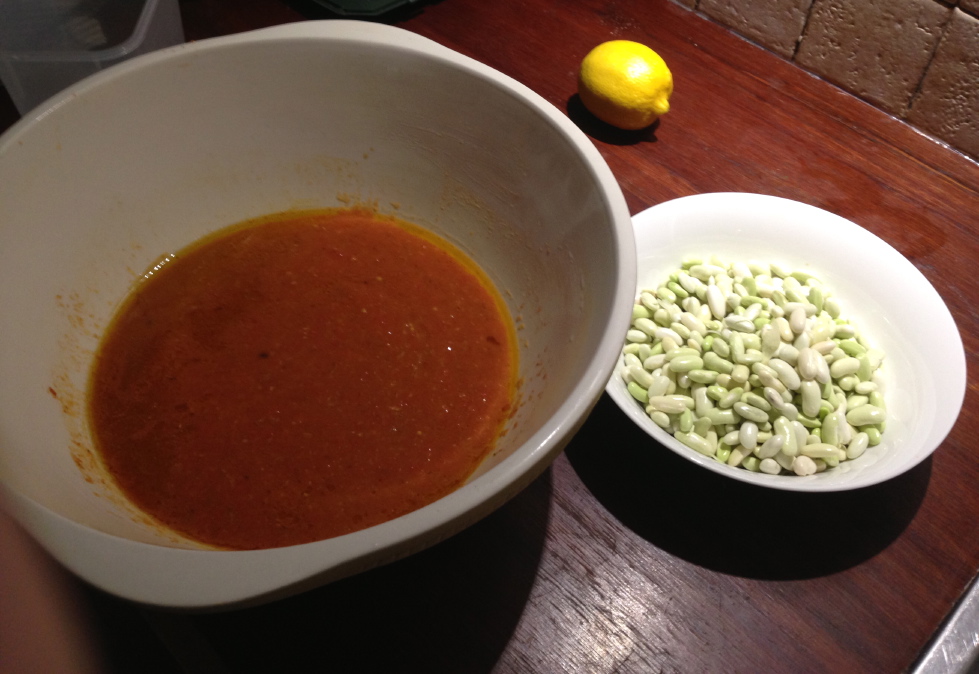
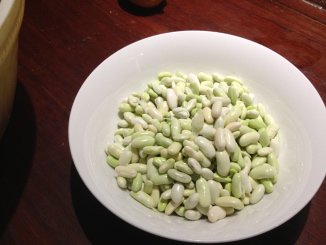
As it has turned out, from Feb to now (late April), Braidwood and surrounds have received above average rainfall and has gone from looking very parched to looking obscenely green. It has also been warmer than expected, which has meant that the tomatoes and climbing beans have cropped well. This time of year is when the vegie garden slows down and tasks such as weeding, tidying up are the main activities. We have an excellent crop of kale (which will provide us with excellent greens throughout our frosty winter); also turnips, beetroots, rocket, parsnips, pumpkins and potatoes. One of the great pleasures of growing a large crop of beans is letting the last of the crop mature into haricot beans. If you have only ever had the shop-bought, dried variety you are missing out on how wonderful the fresh variety are in stews and soups. Shelling is a meditative process – lovely sitting on the steps of the studio in the late autumn sun. The following recipe is a bit more complex, but you can make it in quantities and it improves the next day. Some of the component parts can be made and frozen for later use.
The pedestrian cassoulet
Step 1: take about 1/2k of very ripe tomatoes (small imperfections are fine). Core and pack them into a shallow baking dish with salt, bay leaves, garlic cloves, and sprinkled liberally with olive oil. Put the tray into a VERY hot oven and wait until they start to smoke (this imparts a lovely smoky flavour, however, watch closely!) and then turn the oven down to about 100 degrees C or a bit less and leave to cook for about 3 hours until they are slightly shrivelled and aromatic. Place the roasted tomatoes into a mouli with a fine sieve and rotate to remove skin and seeds and you have a lovely red tomatoe puree . Put about one and a half ladles of this puree into a bowl for use now. Put the remainder of the puree into an airtight container and freeze for future use – fantastic base for any soup or stew.
Step 2: cut 1 small carrot into small dice; finely chop a large bunch of parsley; chop into dice about 80 gm of chinese preserved pork
Step 3: heat olive oil in a heavy based pan with a tight fitting lid. Gently melt the carrot, parsley and chinese pork over a medium heat, stirring regularly. After a few minutes, add a slurp of Chinese cooking wine or white wine; turn up the heat and stir till the liquid has evaporated. Add shelled beans, salt and pepper and enough chicken stock to cover the mix. Add in a bay leaf, fresh winter savory or thyme and bring mixture to a gentle simmer.
Step 4: warm oven to about 100 degrees C. Transfer the loosely covered pot to the oven to cook slowly for about 2 hours. Then, take pot out of the oven and add the tomato puree and more chopped parsley and return to the over for about 1 hour. By this stage the dish should have a thick, not too liquidy quality – if it is a bit too wet, take the lid completely off in the oven to allow some to evaporate. Just before serving stir through a generous dollop of sour cream. Serve as it is – delicious!
February 2014
It has been a difficult spring and summer here in Braidwood and I’m thankful that there is any produce at all. Spring and early summer were cold; a late frost wiped out virtually all the fruit in the district and a massive hailstorm just after Xmas day, shredded the remaining vegetables. Most recovered, however they lost 2 – 3 weeks of growth. The now long string of exceptionally hot days in late January and early February has greatly affected fruiting of vegies such as beans and destroyed anything that isn’t regularly and plentifully watered. Many established trees are struggling and look stressed. This is despite the fact that during the past two years, rainfall was above average. However, evaporation rates have risen in line with general predictions for the area’s climate in a changing world. While rainfull is reasonable, it is the evaporation rates have risen rapidly mainly due to an increase in the frequency of hot north-westerly winds. Despite all this, I have some reasonable crops and a couple of successes. New crops which have done well so far are Armenian cucumbers and black Spanish radishes. The cues are particularly delicious – almost like a green rockmelon and they go well with the seed-pods of the black radishes. Radish seed-pods are deliberately cultivated in some parts of the world. They are green, crunchy with a delicate radish-like pungency and go well with cucumber as a kind of fridge pickle.
Another two plants that have done well this year are: Shizu, an asian member of the basil family which has a distinctively meaty flavour which suits noodle dishes and salads, and French tarragon: a plant with a famous affinity with chicken. If you simply take a fresh free range chook and fill its cavity with a generous amount of French tarragon, some lemon juice and rub olive oil and salt over the chicken then roast, the result is an aromatic and delicious roast chook.
February recipe – Armenian cucumber and radish seed-pod fridge pickle
Ingredients:
1 medium sized Armenian cucumber (30-40cm long)
1 soup bowl of radish seed-pods
1 clove garlic, peeled and crushed
1 small handful of French tarragon leaves, chopped finely
Good quality white wine vinegar or a fruit vinegar
A dash of light soy sauce
A dash of fish sauce
Salt to taste
1/2 teaspoon of sugar
Method:
Peel cucumber and chop roughly into bite sized chunks. Wash radish seed-pods and remove stalks. In a bowl, mix 1/4 cup of white vinegar (the resulting pickle should not swim in vinegar, enough to wet the vegies) with a dash of soy and fish sauce to taste; add salt if needed, sugar, garlic and finely chopped tarragon leaves. Mix thoroughly with the cucumber and radish pods and put into fridge to mature for a few hours before serving cold. Goes really well with cold meats, roast lamb and smoked salmon.
As always at this time of the year, we have a plethora of zucchinis. Excess zucchinis make excellent bread and butter pickles – just adapt bread and butter cucumber recipes or google up zucchini pickles recipes.
I recently discovered another delicious way of cooking zucchinis. In Chinese and Malay cooking, stir frying beans or snake beans with fermented black beans or balachan (fermented fish paste) is a classic dish. Zucchinis can be treated in a similar way.
February recipe – Zucchini and black bean stir fry
Ingredients:
1 medium sized zucchini, sliced thinly
some Chinese fermented black bean paste
small handful of ikan bilis (very small dried fish, best purchased gutted and ready to use. Found in the Malay-indonesian supermarket shelves)
light soy sauce
olive oil for frying
Method:
Heat a heavy bottomed frypan or wok until very hot. Pour in enough oil to cover the pan. Work quickly as oil will smoke. Add the zucchinis and ikan bilis and stir until they start to colour and start to go transparent (usually about 2 mins). Add 1/2 – 1 tbsp of fermented black bean paste and a slurp of light soy. Continue to stir fry for 1 minute ensuring that the black bean paste is well distributed. This dish is so delicious – simply serve as a vegie course. Green beans can be cooked in much the same way, although they take a bit longer.
January 2014
We recently had dinner in Ashfield (Sydney) in one of our favourite Chinese restaurants. They have recently added some classic Szechuan dishes to their repertoire. We ordered a dish called ‘Fish in Deep Chilli’. This is what arrived and it was delicious and fragrant – not super hot, despite all the Chillies and Szechuan pepper. Memorable – we’ll order it again!

October recipe – Lovage Chicken hotpot
Lovage – leaves and root – is a member of the same tribe as carrots, dill, angelica and many other similar flavouring herbs. Lovage has a distinctive quality that is a mixture of curry-like, celery-like, carrot-like and slightly lemonish.
It is unbelievably well matched with chicken and can turn a simple dish of poached chicken in stock into something worthy of an emporer’s table. It is perennial that tends to die down to its roots in winter in cold climates and its leaves can be used in summer and the roots, dug up and used in winter. In warm climates, it is best grown in a large container as it can become quite a weed. In cold climates, such as Braidwood, this is not an issue. Lovage is best obtained as small potted seedlings from specialist nurseries and given a reasonably rich soil and water, it will grown into a large and attractive plant in one season. When it flowers and sets seed, it is worth collecting the seeds before they drop; they make a fantastic aromatic addition to many dishes.
Ingredients:
1 free range chicken
1 litre chicken stock
50 cloves garlic
1 medium size celeriac bulb, cut into cubes
1 – 2 medium carrots, cut into chunks
3-4 small onions or red shallots, peeled but leave root end in tact so that they don’t disintergrate
1 small handful of lovage leaves or finger length piece of lovage root
1 small Chinese preserved pork cooking sausage
1 tblspn Chinese cooking wine
Juice of 1 lemon
1 bay leaf
seasoning to taste
Method:
Pre-heat oven to just below 100 degrees C. Use a casserole pot that can work on stove top and in the oven. Place garlic, carrots,onions, celeriac, lovage, bay leaf and Chinese preserved pork sausage on the bottom of the cook pot. Place whole chicken on top. Pour over chicken stock; the liquid should just about cover the chicken (if necessary, add a bit of water or white wine). Add lemon juice. Gently heat on the stock top until simmer. Add tblspn Chinese cooking wine and simmer for further minute until the alcohol has evaporated. Cover and place pot in the centre of oven. Hold temperature at about 90 degrees for three hours or longer. The chicken will cook perfectly to the point that it can be carved with a spoon! To serve: about half an hour before serving, heat some oil or butter in a heavy bottomed pan and add either a cup of Freekah or arborio rice; toss until well coated. Add two cups of the stock that the chicken has been cooking in to this mixture. Turn heat to very low, add salt and pepper to taste, cover and leave for 30 – 35 mins until it is cooked. Serve chicken on the rice or freekah with a green salad.
 Brain of Braidwood, Italian choggia variety
Late winter – early spring
Spring is the season for digging in green manure crops. For the past few years, I have been growing a mixture of fenugreek (a legume well suited to cold climates), lucerne, any peas or broadbeans left over from the previous season, combined with a brassia mustard mix which has anti-nemode advantages. This green manure crop is dug in about 8 weeks before the next crop is to be planted. It needs to break down thoroughly before any further plantings and the sterilising qualities of the mustard mix requires that it be thoroughly buried so that it can rot and release its chemical benefits. This approach has given very good results in previous seasons.
Apart from preparations for spring plantings such as digging in the green manure crop, there is not much going on and I have turned my hand to sausage making. Sausages are fun to make and absolutely delicious to eat. Resurrect your grandmother’s meat grinder! What follows is my recipe for the Pedestrian Sausage of Braidwood.
Ingredients:
1.5 kg pork neck
500gm belly pork (nice and fatty, a good sausage is about 25% fat)
50-100gm homemade breadcrumbs (which bind juices but should never be more than 5% of total weight)
1 whole nutmeg, grated
4-5 bay leaves, chopped to a powder
1 small sprig Rosemary, chopped very finely
1 small handful of whole black peppercorns, freshly and finely crushed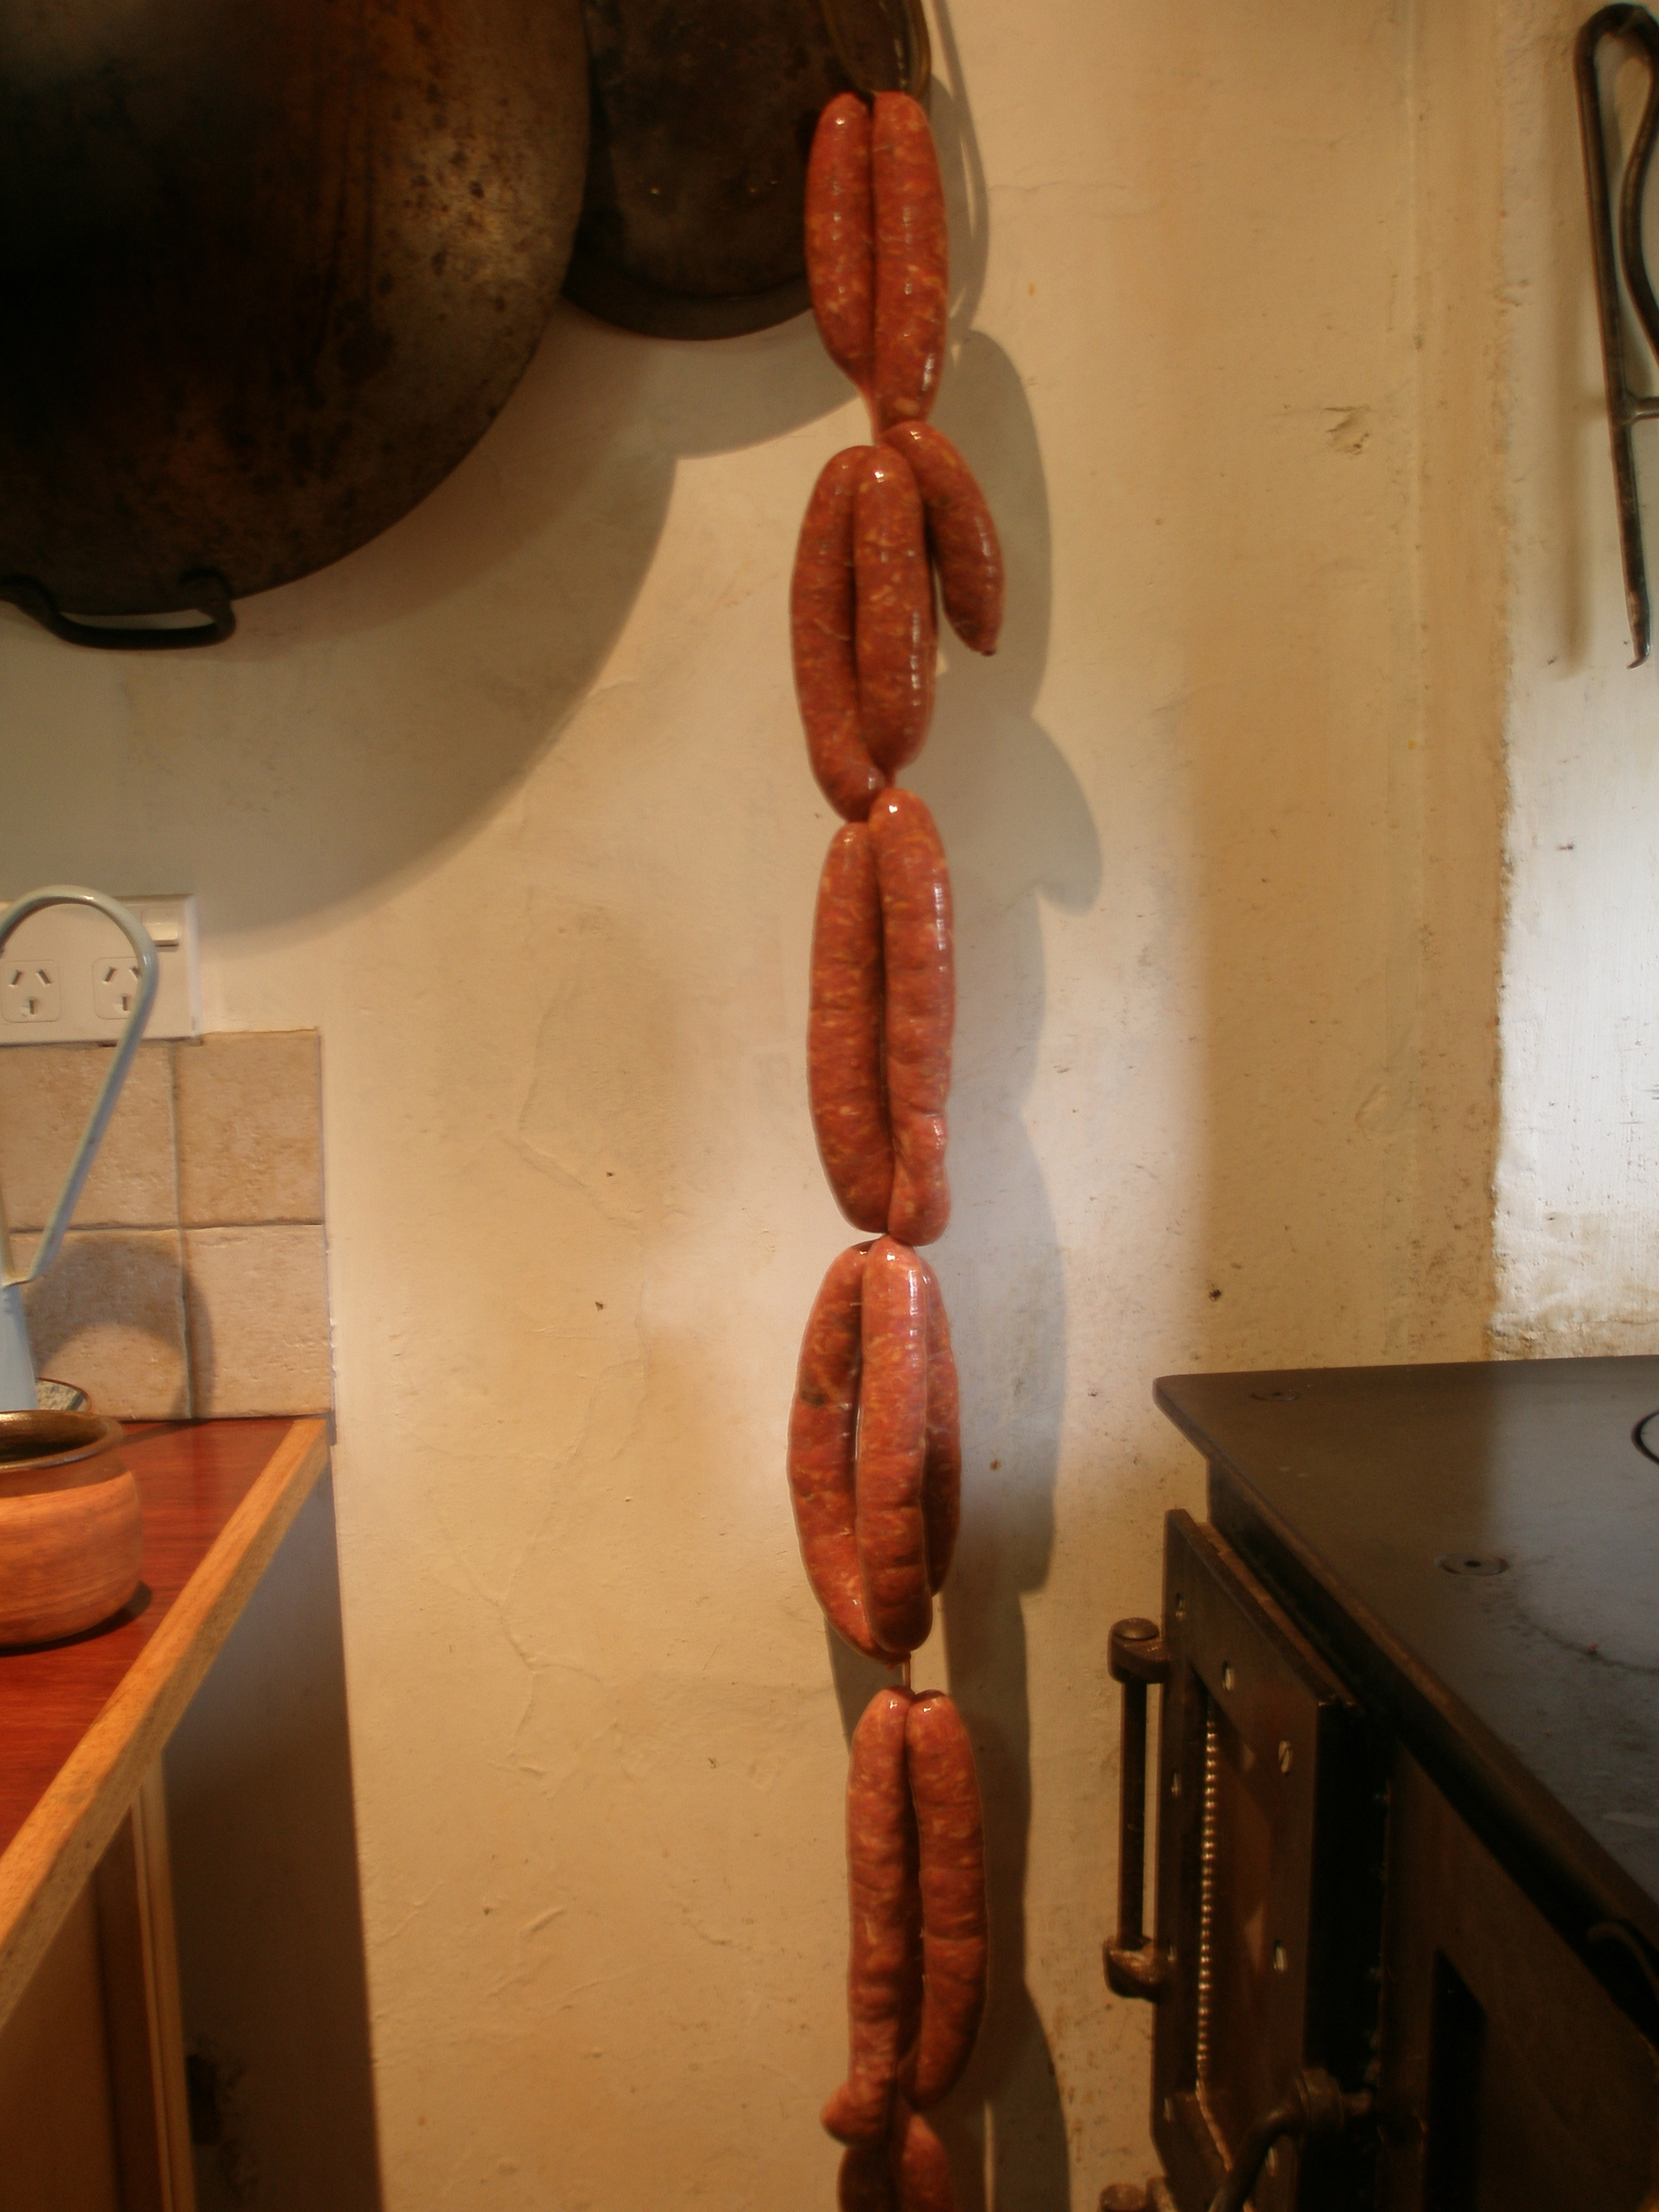
1 handful dried Porcini mushrooms, soaked in a cup of hot water
1 glass white or red wine
20gm salt (this is for fresh sausages. If making salamis, double this quantity)
3 cloves of garlic, mashed
Large sausage bungs
Method:
Order the sausage bungs from your butcher – he will know how much you need for the given weight – and make sure that he has removed the rind from the belly pork.Cut meat into chunks and process through mincer on the coarsest setting. Also mince the re-hydrated Porcini mushrooms at the same time. Place the mince mixture in a bowl and add the remaining ingredients. Mix through thoroughly by hand and leave to marinate for a few hours in a cool place (about 10 degrees), covered for a few hours. Do not place in the fridge at this stage.
Prepare the mincer for stuffing sausages as per the instructions supplied by the manufacturer or by your grandmother. Lightly oil the nozzle of the sausage extruder and then thread the bung onto the nozzle until the nozzle is completely covered. With practice, it is possible to pack about 5 metres of bung onto a quite short nozzle. Leave about 60cm of bung trailing off the nozzle. Do not tie it off yet as you need to let trapped air out. Shove the meat mixture into the funnel and start turning handle. The meat should come out a nice gentle pace; the little finger should be placed under the nozzle and used to control the feed of the bung and the remaining fingers cradle and support the sausage as it emerges. An assistant to pack in the meat mixture or turn the handle is a good idea, along with wine or grappa to lubricate the process (persons, not the mixture) is traditional.
Clear the decks – after a time, one should have a very, very long sausage cavorting on the table. Now comes the only tricky part of sausage making: tying and twisting into a chain of sausage-lets. This is extremely difficult to describe and I would recommend that either you obtain a copy of one of the best demonstrations and explanations I have seen of twisting sausages on the DVD of the BBC programme “Pig in a Day” on sale at ABC shops or, twist the arm of your butcher to show you.
A good use for sausages like this, apart from burning them on the barbie, is in the almost infinite variety of dishes using lentils or beans, sausages and wine. These dishes all need a sausage which is pure meat, aromatic and flavoursome.
Recipe: Lentils and Pedestrian Sausages for 4 people
4- 8 sausages, depending on size and appetite
3 cans green lentils, drained
1 bay leaf
1 medium carrot
4 whole hands of spring garlic
300ml white wine
1 can Tomatoes (optional)
Seasoning to taste
Method:
In an ovenproof, lidded casserole dish, lightly brown the sausages with a slurp of olive oil, then add wine and boil for a few minutes to remove alcohol. Add the remaining ingredients. At this stage be careful about adding extra salt – over the next 2 hours of slow cooking, the seasoning in the sausages will gradually infuse through the dish. Cook slowly in a 100 degree oven for about 2 – 3 hours. Serve with crusty bread, a dish of bitter winter chicory dressed with balsamic vinegar.
Bon appetit!
Good Roots (and leaves)!
Burdock is a root vegetable which is very popular in Japan and Europe and deserves to be grown more widely. It is very hardy, being a member of the artichoke thistle family, has a deep edible tap root which it brings nutrients from a metre below the surface back into circulation. It is also delicious to eat. It requires a reasonably deep soil, however, if the soil is very heavy the roots which will penetrate quite deeply, can become almost impossible to dig out. This property could be very useful to natural sequence farmers because, unlike many members of the thistle family, it is a vegetable and not a declared noxious weed. However, if you let burdock set seed, it will take over the garden. Best to remove the f lower heads which resemble artichoke thistle flowers well before they reach seed stage.
Preparation and cooking of Burdock is slightly complicated but once prepared it can be kept in the fridge and portions used for days afterwards. The roots should be washed and scraped, cut into julienne strips which should be put immediately into an acidulated (and lightly salted) pot of water and then simmered for about 30 minutes. Burdock remains more crispy than parsnips or salsify and has a flavour somewhere between the two. A nice way of serving burdock is to prepare a warm dressing of soy sauce, a small amount of white wine vinegar or mirin, a touch of miso and a smidgin of freshly grated ginger. Heat the dressing in a pot, add the previously prepared burdock and when heated through, serve as a delicious entrée.
Salsify, as it was previously known vegetable oyster, is another root vegetable that used to be grown in Australia but for some reason has become largely forgotten. There are two distinct types: one is the black root favoured by Italian gardeners and the other, the French white root salsify. Growing and eating requirements for both types are much the same.
The Italian variety is more resistant to becoming woody and both have attractive yellow dandelion-like flowers and will naturalise easily and therefore, like burdock, best to remove the flowers before they set seed unless you want to have repeat cropping. They grow best in a light, deep, sandy loam type of soil. While the roots will penetrate heavier soils, the roots then become very hard to dig out. Salsify and burdock should both be planted in early spring and are at their flavour-best in autumn after a frost. They will keep in the ground for long periods. When cooked, salsify has a creamy texture with a slightly nutty, parsnip flavour.
To prepare salsify: Peel outer black (or white) skin and put into acidulated water to stop them from going brown. Any pieces larger than a finger-width should be cut in half and then cut into 8cm lengths. Salsify can be poached in a court bouillon until tender and then stored in acidulated water in a jar in the fridge until needed. I like to serve them by warming them in butter, lemon juice and a dash of salt and freshly ground black pepper. Delicious. Also can be served in a clear chicken broth along with some chinese chicken dumplings.
Lovage – leaves and root – is a member of the same tribe as carrots, dill, angelica and many other similar flavouring herbs. Lovage has a distinctive quality that is a mixture of curry-like, celery-like, carrot-like and slightly lemonish. 
It is unbelievably well matched with chicken and can turn a simple dish of poached chicken in stock into something worthy of an emporer’s table. It is perennial that tends to die down to its roots in winter in cold climates and its leaves can be used in summer and the roots, dug up and used in winter. In warm climates, it is best grown in a large container as it can become quite a weed. In cold climates, such as Braidwood, this is not an issue. Lovage is best obtained as small potted seedlings from specialist nurseries and given a reasonably rich soil and water, it will grown into a large and attractive plant in one season. When it flowers and sets seed, it is worth collecting the seeds before they drop; they make a fantastic aromatic addition to many dishes.
Always keen to share interesting recipes and source heritage vegetable seeds, if you have any tips, please use the contact form below.
[CONTACT_FORM_TO_EMAIL id=”1″]